
Creative product photography is no longer just about showing what a product looks like — it’s about telling a story that captures attention and drives action. Whether you’re shooting for eCommerce, social media, or advertising campaigns, the way you present a product can directly influence how customers perceive your brand and whether they choose to buy.
From lighting and composition to props and camera techniques, small creative decisions can transform a simple product shot into a high-impact visual. The challenge is knowing which techniques actually make a difference — and how to use them effectively without overcomplicating your setup.
In this guide, we’ll break down the most effective creative product photography techniques, along with practical tips you can apply straight away. Whether you’re a beginner or looking to refine your current approach, these ideas will help you produce more engaging, professional, and conversion-focused product images.
Key Takeaways
- Creative photography drives conversions: Strong product visuals don’t just look good — they directly influence buying decisions and brand perception.
- Lighting is everything: Mastering soft, directional, and backlighting techniques is key to highlighting product details and texture.
- Simple setups can be powerful: You don’t need complex equipment — thoughtful composition and props can elevate even basic shots.
- Variety increases engagement: Using different angles, styles, and concepts (e.g. flat lay, lifestyle, macro) keeps your visuals fresh and impactful.
- Consistency builds brand identity: A cohesive visual style across your product images strengthens recognition and trust.
- Technique + creativity = results: Combining technical skills with creative ideas is what turns standard product shots into standout visuals.
How to Use Props in Product Photography (With Creative Ideas)
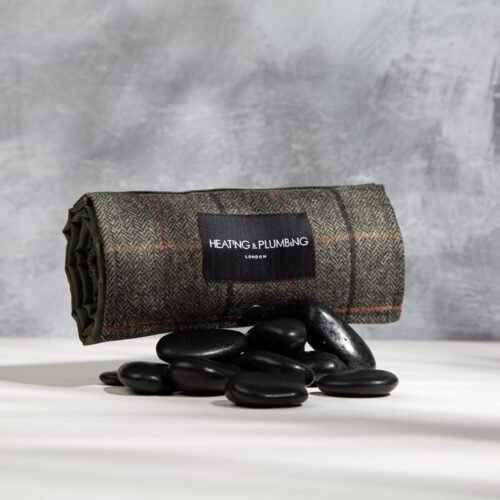
Using props in product photography is one of the easiest ways to transform a simple image into something visually engaging and memorable. Props help add context, tell a story, and create an emotional connection with your audience — all of which can influence buying decisions.
When selecting props, think about the message and atmosphere you want to communicate. Are you aiming for a clean, minimalist look, or something more bold and expressive? The key is to choose props that enhance the product without distracting from it.
For example, jewellery photography often benefits from soft, romantic elements like rose petals, while lifestyle products can be paired with books, plants, or textured materials to suggest everyday use. Materials such as stone, marble blocks, or painted wooden plinths are also highly effective for adding depth and a premium feel.
👉 Tip: Keep props relevant, balanced, and intentional — too many elements can overwhelm the product and reduce clarity.
Best Lighting Techniques for Product Photography (Studio & Natural Light)
Lighting is one of the most important factors in creating high-quality product images. The right lighting setup can highlight texture, shape, and detail, while poor lighting can make even the best products look flat or unappealing.
Natural light can work well in controlled conditions, particularly when diffused through windows or soft materials. However, for consistent and professional results, artificial lighting such as LED panels or studio lights is the preferred choice.
With controlled lighting, you can:
- Adjust brightness and direction
- Create soft or high-contrast effects
- Control reflections and shadows
Using multiple light sources positioned at different angles helps create a balanced and evenly lit image. This is especially useful for reducing harsh shadows and ensuring the product is clearly visible from all sides.
👉 Tip: Experiment with soft lighting for clean eCommerce shots and directional lighting for more dramatic, high-impact visuals.
Why a Professional Product Photography Studio Setup Matters
A professional studio setup allows you to produce consistent, high-quality product images across different shoots and product types. With access to lighting equipment, reflectors, stands, and modifiers, you gain full control over your environment and results.
Studio setups also make it easier to:
- Maintain consistent lighting across images
- Create different visual styles using gels or diffusers
- Adjust compositions quickly and efficiently
Having a range of props and surfaces readily available also helps you build creative scenes that enhance the product’s appeal while still accurately representing it.
Ultimately, a professional setup streamlines your workflow and ensures your images meet commercial standards — especially important for eCommerce and advertising.
Exploring Product Photography Angles and Perspectives for More Engaging Shots
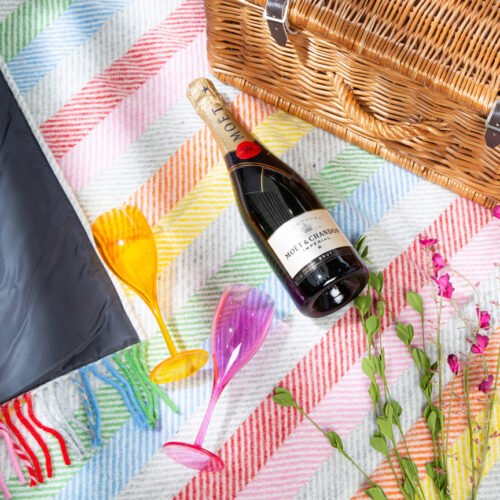
Changing your camera angle is one of the simplest ways to create more dynamic and interesting product photos. Different perspectives can highlight unique features, add depth, and make your images stand out.
Some effective angles to experiment with include:
- Top-down (flat lay): Ideal for lifestyle and social media content
- Low angle: Makes products appear larger and more dominant
- Eye-level: Creates a natural, relatable perspective
- Close-up (macro): Highlights fine details and textures
You can also enhance your composition by experimenting with framing techniques, such as placing objects in the foreground or using props to guide the viewer’s eye.
Consider how the image will be used as well. For example:
- Narrow compositions work well for banners
- Horizontal layouts suit social media and websites
👉 Tip: Test multiple angles for each product — small changes can make a big visual difference.
Best Camera Settings for Product Photography (Sharp, Professional Results)
Using the correct camera settings is essential for capturing sharp, high-quality product images. Even with great lighting and composition, poor settings can reduce image clarity and detail.
Start with a low ISO to minimise noise and maintain clean image quality. Next, adjust your aperture (f-stop) — a higher aperture (e.g. f/8 to f/16) keeps more of the product in focus, which is ideal for product photography.
Shutter speed should be adjusted based on your lighting conditions. When using a tripod, you can use slower shutter speeds without introducing blur, allowing for better exposure.
Key settings to focus on:
- Low ISO for clarity
- Medium–high aperture for sharpness
- Controlled shutter speed for proper exposure
👉 Tip: Always use a tripod for consistent, blur-free results.
Choosing the Best Backgrounds for Product Photography
The background you choose plays a major role in how your product is perceived. A well-selected background enhances the subject, while a poor one can distract from it.
In most cases, simple backgrounds work best. Neutral tones, subtle textures, or soft colours help create contrast without overpowering the product.
For more creative shots, you can introduce elements such as:
- Plants for a natural feel
- Furniture or surfaces for lifestyle context
- Textured materials for depth and interest
The key is to maintain balance — the background should support the product, not compete with it.
👉 Tip: Stick to a consistent background style to strengthen your brand identity.
Product Photography Post-Processing Tips (Editing for a Professional Finish)
Post-processing is the final step in creating polished, professional product images. Even well-shot photos benefit from subtle editing to improve colour accuracy, sharpness, and overall visual appeal.
Start with colour correction to ensure accurate tones and balanced contrast. Tools like Adobe Lightroom or Photoshop allow you to adjust exposure, white balance, and saturation with precision.
Sharpening helps bring out fine details, while noise reduction is useful for cleaning up any grain, especially in low-light images.
Key editing steps include:
- Adjusting colour and white balance
- Enhancing contrast and brightness
- Applying sharpening for clarity
- Reducing noise for a clean finish
👉 Tip: Keep edits subtle — over-processing can make images look unnatural and reduce trust.
FAQs
What are the best techniques for creative product photography?
The best techniques include using props to add context, experimenting with lighting (soft, directional, or backlighting), trying different angles, and using clean backgrounds. Combining creativity with strong technical setup helps create more engaging and professional product images.
What lighting is best for product photography?
Soft, diffused lighting is ideal for most product photography as it reduces harsh shadows and highlights detail. Studio lighting such as LED panels or softboxes provides consistent results, while natural light can work well when properly controlled.
How can I make my product photos look more professional?
To make product photos look professional, use consistent lighting, a clean background, sharp focus, and thoughtful composition. Editing techniques such as colour correction and sharpening can also enhance the final image.
What camera settings should I use for product photography?
Use a low ISO (100–200) to minimise noise, a higher aperture (f/8 to f/16) for sharpness, and adjust shutter speed depending on lighting conditions. Using a tripod helps maintain stability and consistency.
Why are props important in product photography?
Props help create context, tell a story, and make images more visually interesting. When used correctly, they enhance the product without distracting from it and can improve engagement and conversions.
What background works best for product photography?
Simple, neutral backgrounds work best as they keep the focus on the product. Subtle textures or colours can add depth, but overly busy backgrounds should be avoided.