
You cannot photograph glass. You can only photograph what sits behind it and around it. That is why a bottle lit from the front goes milky and grey: there is nothing distinct for a transparent material to catch. Every guide that tells you to eliminate reflections is describing the process that produced the frame you are unhappy with. Those dark contour reflections down the sides of a bottle are not the flaw. They are what makes glass read three-dimensional and expensive.
Knowing how to photograph glass products comes down to one decision made before a single light is switched on: bright field or dark field. Everything else descends from it. Choose the wrong one for your background and no amount of diffusion, filtering or retouching rescues the frame, because every adjustment after that point pulls towards the opposite result. This guide covers bottles, jars, glassware, frosted and coloured beauty packaging and fragrance, and it is how we shoot glass as a Central London commercial studio.
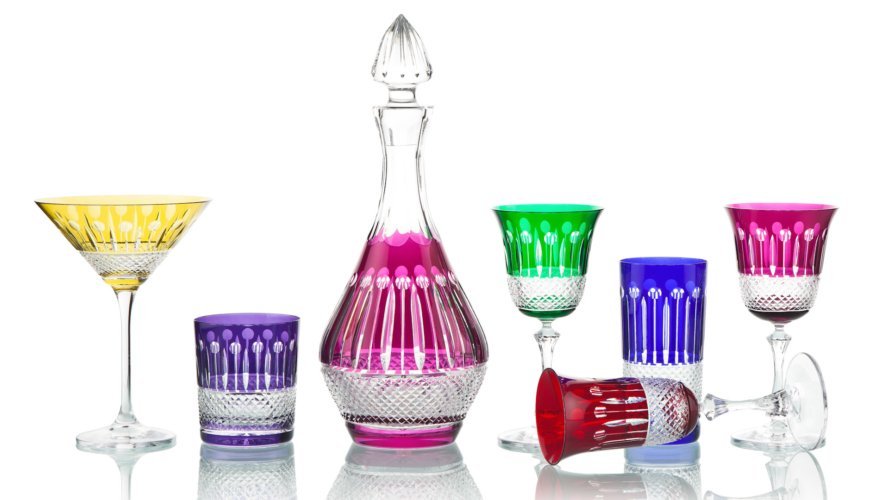
Before you choose a strategy, read what your current frame is already telling you.
Step 1: Read What Your Bad Frame Is Telling You
You have a photograph that is correctly exposed, correctly focused and still looks like a picture of nothing. Five things go wrong with glass, and each one has a specific physical cause.
| What you are seeing | What is actually happening | Where it is fixed |
| Milky, grey, shapeless glass | Lit from the front, with nothing behind for the glass to transmit | Step 3 |
| Room, window or you in the bottle | The glass is reporting the set, not itself | Step 2 |
| Blown-out white hotspot | A small hard source reflecting specularly | Step 4 |
| Edges vanish into the background | No tonal separation; wrong parent strategy for that background | Step 3 |
| Green or blue cast in clear glass | Iron oxide in the glass, not white balance alone | Step 6 |
| Dust that only appears at 100% | Small apertures render sensor and surface dust sharply | Step 2 |
One piece of optics sits behind all of it. Flat, smooth surfaces reflect light directly away from the lens and read dark. Edges, curvature and scratches scatter light into the lens’s acceptance angle and read bright. That single rule has two opposite outcomes, which is why the same bottle can be made to show hard dark edges or glowing bright ones with nothing changed except where the light and the camera sit.
Three words are worth having straight, because the rest of this guide leans on them. Specular reflection bounces at a predictable angle, like a mirror. Diffuse reflection scatters in every direction. Refraction bends light on the way through the material, and it is why the edge of a bottle is optically the densest part of it: the light has further to travel through glass there than anywhere else.
The green cast is the one exception, because it is the glass rather than your camera. Ordinary float glass carries roughly 0.10% iron oxide, which absorbs red and passes green, and the tint accumulates with the distance light travels through the material. Step 6 deals with it properly, alongside the coloured and frosted glass that does the same thing by design.
Every symptom in that table is a set problem, not a camera problem, which is why the next step is the room and not the settings.
Step 2: Clean the Glass and Take the Room Out of the Shot
The advice about where to shoot contradicts itself: a windowless room with grey or black walls, or a spot near a big window. Both are right, for different strategies.
Window light is a large soft source and suits dark-field and edge-lit work, where you want one broad wrap and nothing else. It ruins a strobe-metered bright-field setup: ambient you cannot meter is ambient you cannot repeat. Mixing flash and daylight? Kill the daylight.
Then take the room out:
- Wall and ceiling colour matters more here than anywhere else. A bottle reflects the whole hemisphere in front of it, so a warm wall becomes a warm band down the glass.
- Wear black, or stand behind a black card with a hole cut for the lens. You are a reflection like any other, and a bottle sees the whole room.
- Clean it once, then glove up. Isopropyl alcohol and a lint-free cloth, then cotton or nitrile gloves from there on.
- Do the final dust check in live view at 100%, not by eye. Dust is an aperture effect as much as a cleanliness one, showing as distinct spots at f/11 and smaller.
- Choose the surface for what it reflects. Black acrylic gives a controlled mirror under the bottle, frosted acrylic a lit base with no reflection at all.
Window light is fine for one hero on a black ground. Skip it when frame twelve has to match frame one.
Step 3: Choose Bright Field or Dark Field Before You Switch a Light On
Glass products get lit one of two ways. Every technique you have read about, the light tent, the black cards, the backlit strip, the white sweep, is a variation on one of them, and knowing which one you are building is what stops two tutorials contradicting each other.
Bright field. The glass sits in front of a lit, brighter background. The source sits at roughly 45 to 90 degrees to the subject and lights the background rather than the bottle. Smooth surfaces bounce light away from the lens, so the body reads bright and clean, and you then carve the edges dark with black flags. This is the white background e-commerce look.
Dark field. A large diffused source sits behind the subject with a black patch or card between the light and the glass, so no direct light reaches the lens. The light works low, roughly 10 to 45 degrees. Only scattered and refracted light from the edges gets to the camera, so the edges glow bright against pure black.
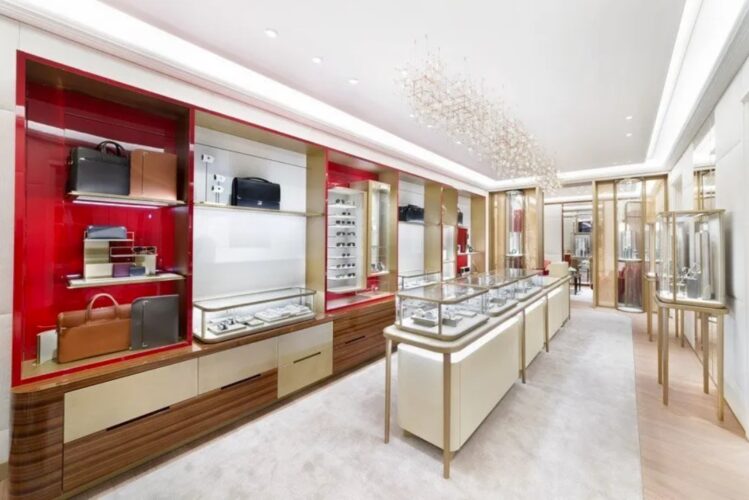
Three build specs make dark field work rather than nearly work. The camera’s field of view must stay smaller than the dark-field patch, or the background will not be truly black. Moving the patch further from the light source softens the edge transition. And the working distance between the patch and the subject is small, often around an inch.
Two habits separate a working set from a nearly-working one. Rotate the bottle a few degrees at a time and watch which edges catch, because the angle of incidence decides what lights up and turning the subject is faster than moving the light. Then baffle the lens: aperture flags or side cards around the front element stop stray light creeping in as flare, which is what turns a pure black background into a washed grey one.
| Your shot needs | Use | Why |
| White or light background, e-commerce, Amazon-style | Bright field | The background carries the exposure; edges get defined with black flags |
| Dark, premium, editorial, spirits and fragrance | Dark field | Edges glow; the body stays dark and dimensional |
| Label legible and glass shaped | Both, as separate exposures | See Step 5 |
[IMAGE: Overhead lighting diagram, bright field. Plan view. Camera at the bottom of the frame on a tripod, 100mm macro. Bottle centred on a shooting table. Behind the bottle, a large diffused source (softbox or scrim-lit white background) angled at 45 to 90 degrees to the subject axis, aimed at the background rather than at the bottle. Two black foam-core flags angled in from camera-left and camera-right, just outside the frame edges, roughly a hand’s width from the bottle and turned about 30 degrees toward the camera so each reflects as a dark band down the side of the glass. Label the light-to-background distance, the bottle-to-background distance and the flag-to-bottle distance. Annotate the 45 to 90 degree light angle.]
[IMAGE: Overhead lighting diagram, dark field. Plan view. Camera at the bottom of the frame on a tripod, 100mm macro. Bottle centred. Directly behind the bottle, a large diffused source at a low angle, roughly 10 to 45 degrees. Between the light and the bottle, a black dark-field patch sized wider than the camera’s field of view and positioned close to the bottle, about an inch of working distance. Strip box at camera-left, its long dimension taller than the bottle, raking across the edge. Aperture flags or side baffles drawn around the lens to block stray flare. Annotate: patch must exceed the camera’s field of view; increasing light-to-patch distance softens the edge transition.]
Selling on a white background? Start bright field. Selling a premium bottle? Start dark field. Do not try to build both in one frame. Build them as two exposures.
Step 4: Shape the Edges Deliberately With Black Flags
A bottle with no reflections in it does not look clean. It looks like a drawing of a bottle.
Black cards are positioned deliberately to create dark lines that define a bottle’s contours, and those dark reflections paradoxically make glass appear more dimensional and premium.
Most guides have that backwards. You are not removing reflections. You are choosing them, and the dark ones read as expensive.
The method, in order:
- Light the space around the glass, not the glass. As the New Layer setup puts it, “instead of lighting the actual item, you want to set up the lights in the right positions, and using the right modifiers, to create the best reflections possible.”
- Set the source size before anything else. The bigger the source relative to the bottle, the softer the highlights and the more flattering the curve. A strip box taller than the bottle gives one continuous graduated edge highlight. A small source gives you a hotspot and nothing else.
- Place the negative fill. A black card close to the bottle, opposite the key, is the secret weapon behind the deep blacks professionals expect. Start a hand’s width out and walk it in, watching the dark band widen.
- Iterate. There is no fixed recipe, and anyone who gives you one has not shot much glass. Small changes in flag angle and distance produce visibly different edges, which is why this is done in live view with the camera locked off.
Weigh the two outcomes. Removing every reflection buys a clean frame and costs you the shape of the product. Placing reflections deliberately costs an hour of flag positioning and buys a bottle that looks like it costs what you are charging for it. The same trade governs every shiny surface, which is why we treat it as its own discipline in our guide to reflective product photography.
Step 5: Solve Labels, Caps and Liquid With Separate Exposures
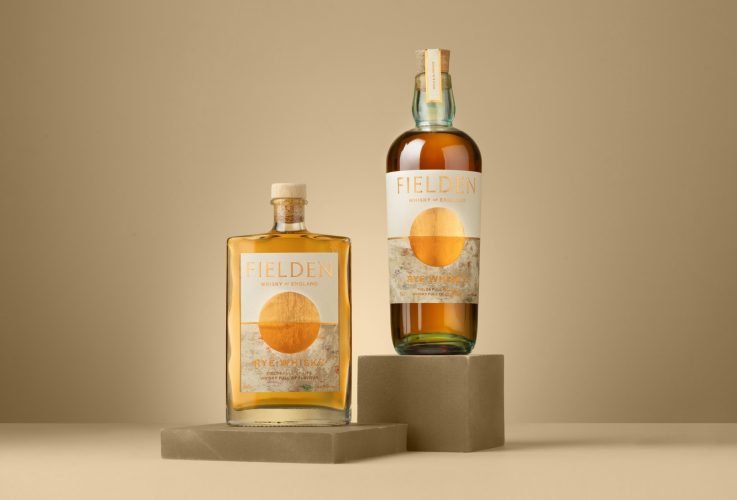
The backlight that makes the glass beautiful kills the label stone dead. The front light that saves the label kills the glass. No single exposure lights transparent glass and an opaque printed label correctly, so professionals stop looking for one.
Commercial beverage photographer Brian Rodgers Jr. puts it directly: “I’m breaking it down and building the shot in pieces… putting emphasis on one area of the product at a time.” His subject was a cylindrical liqueur bottle with translucent glass, a matte label and opaque liquid: four lighting problems in one frame.
- Lock the camera on a tripod. Nothing moves between frames or the layers will not register.
- Exposure one: the glass body and edges. Backlit or bright field, per Step 3.
- Exposure two: the label. Lit flat and front-on.
- Exposure three: caps, foil and specular highlights, where needed.
- Stack as layers in Photoshop and mask with the pen tool, then frequency-separate the label to lift hotspots without flattening the print detail. Auto-select fails on low-contrast glass edges (Step 8).
Liquid is its own problem. Juice that reads dull is short of transmitted light, and the fix is a white bounce card hidden behind the bottle and out of frame, exactly what one DIY perfume setup did alongside two flash heads at ISO 100, 1/200s and f/13. Liquid colour changes completely depending on whether light passes through it or bounces off it. For condensation, a roughly 50/50 glycerine and water mix is the commonly cited studio recipe, best treated as a starting point rather than a tested standard.
If the bottle has a label, plan the composite from the start. Deciding after the shoot is how people discover the camera moved.
Step 6: Shoot Frosted, Coloured and Faceted Glass
Clear glass is lit for transparency. Frosted glass is lit for surface. Backlight reveals what is inside clear glass, and on a satin-etched bottle it just glows evenly and flattens the whole thing into a grey lump.
| Glass type | What it does to light | How to light it |
| Clear | Transmits and refracts; edges are optically densest | Bright field or dark field, per Step 3 |
| Frosted / satin-etched | Sandblasted or acid-etched rough; scatters light rather than reflecting it specularly | Raking, near-parallel light across the surface to reveal texture; backlight only to separate it from the ground |
| Amber | Attenuates more than 90% of light below 450nm, blocking most UV and blue | Glows warm gold under backlight; use that rather than cooling it back |
| Cobalt | Cuts off around 350nm but still transmits visible blue-green | Holds a cool cast under a warm source; needs more transmitted light than amber |
| Faceted | Every facet is a separate mirror at a separate angle | Fewer, larger sources; each extra light multiplies across the facets |
The green cast from Step 1 belongs in the same family: the body of the glass is colouring the light, not the camera misreading it. Shorten the path. A tall bottle shot more face-on than side-on gives the light less material to travel through, and white balance then corrects what is left.
Fragrance is where this converges, and it is the case most guides name and then abandon. A perfume bottle is four problems sharing one frame: a faceted body, a cap and collar in metal or plastic, the colour of the juice, and usually a foil or embossed label. That is why it gets composited rather than solved, and why the packaging specifics sit in our approach to cosmetic, fragrance and beauty photography.
Three benchmarks, so you can see the gap honestly:
- Professional. Three Profoto D2s: a distant CTO-gelled backlight for a sunlight feel, a 5-degree gridded bottle light fired through diffusion, and a 10-degree gridded top light for the set. ISO 64, 1/1000s, f/8, Hasselblad H6D-400c.
- DIY. Two studio flash heads, one gridded onto the background and one softboxed onto the bottle, plus the hidden white card to lift the juice. ISO 100, 1/200s, f/13.
- Single light. A speedlight at 1/16 power fired into a white wall behind the bottle so the bounce wraps and refracts around the shape, with white cards lifting the dark top.
Angle by angle, our guide to perfume photography goes deeper than this step can.
[IMAGE: Overhead lighting diagram, faceted fragrance bottle. Plan view. Camera at the bottom of the frame. Bottle centred on a black acrylic base. Distant backlight at the top of the frame, warm-gelled, aimed at the background. Gridded narrow light at camera-right roughly 40 degrees off axis, firing through a small diffusion panel positioned directly in front of the bottle. Overhead light drawn as a dashed outline, gridded and diffused, covering the surrounding set only. White bounce card behind the bottle and out of frame, marked as the juice-lifter. Black flag at camera-left. Annotate which light owns which problem: body, cap, juice, set.]
Frosted and amber packaging is the easiest glass to shoot passably and the hardest to shoot well. A faceted fragrance bottle is the opposite: nothing about it is passable until it is right.
Step 7: Set the Camera, Then Shoot It Iteratively
Three guides, three different f-stops, none telling you why. There is no single correct aperture for glass products, only a ceiling, and it depends on your sensor.
| Sensor | Diffraction starts softening | Practical working range |
| Full frame | around f/13 to f/16 | f/8 to f/13 |
| APS-C | around f/11 to f/13 | f/8 to f/11 |
More conservative guidance puts the outer limit at f/16 on APS-C and f/22 on full frame for a sharp 8×10 print, so treat those as the wall rather than the target. Lens sharpness peaks two to three stops down from maximum, commonly f/4 to f/8.
The consequence nobody states: a tall bottle needing a sharp label and a sharp base runs out of usable aperture before it runs out of depth of field. That is your trigger for focus stacking, the honest answer that f/8, f/11, f/14 and f/16 all sidestep.
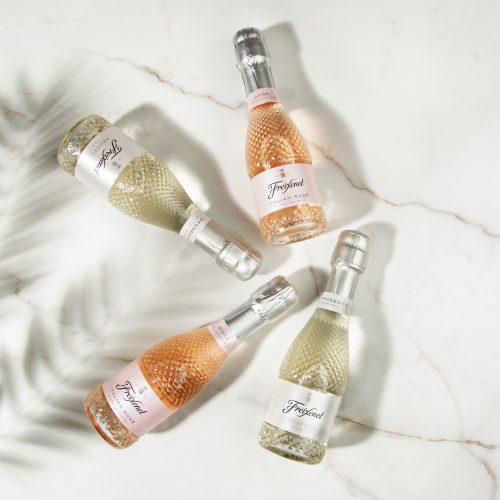
A polariser will not rescue this. It works at Brewster’s angle, roughly 30 to 50 degrees of incidence off a non-metallic surface, so it helps on a glossy label and on the surface a bottle stands on. It is largely powerless against curved specular reflections in transparent glass, cannot cancel reflections arriving from several angles at once, and costs about 1.5 stops. Cross-polarisation nearly kills the reflections on a heavy foil capsule but strips the glass’s natural sheen with them: a trade, not a fix.
Then work the way glass actually gets shot. Tether, or shoot live view against a locked frame. Fire, move one flag, fire again. Check the edges at 100% before the whole frame. Base settings are simple: ISO 100 to 200, at or under sync speed, manual white balance.
Start at f/8 to f/11 on APS-C and f/8 to f/13 on full frame. If the bottle still is not sharp front to back, stack it rather than stopping down past the ceiling.
Step 8: Retouch the Edges, and Know When DIY Stops Paying
On glass, capture decides what the image can be. Retouching is where most of the finish happens, which surprises most people the first time.
Automatic selection fails on a transparent bottle against a neutral background: too little tonal contrast for the software to find an edge. Ask the Adobe forums how to mask a glass bottle off a grey background and you will find the question asked over and over, because the tools that work on everything else do not work here. Pen-tool path work is the job, not an advanced option.
The rest of the retouch:
- Dust at 100%.
- Blending the exposures from Step 5.
- Correcting the green cast from Step 1.
The cost question, in UK numbers:
- UK commercial photographer day rates run roughly £600 to £1,000, or £1,000 to £1,600 for a full creative shoot with styling and complex lighting.
- Glassware is usually billed as a complexity surcharge on top, often from £100 per hour.
- Retouching beyond basic colour correction is a separate line at around £40 (+VAT) per hour, and complex reflective products sit at the top of the £10 to £100 per image range.
A glass shot is not an afternoon. The surcharge buys the iteration in Step 7, not the privilege of handling glass.
Photographing glass products in-house holds up for a handful of SKUs on a repeatable setup. It stops paying with a full range against a deadline, mixed materials in one collection, faceted fragrance, or images that will run large or in print. Rendering in 3D removes the reflection problem entirely and lets you shoot before the bottle exists, though reliable cost and turnaround figures are hard to find.
If your range has outgrown the kitchen table, we are happy to talk it through.
Frequently Asked Questions
How do you photograph glass without reflections and shadows?
You don’t. You control them. Light the background and the space around the glass rather than the glass itself, then use black flags to place deliberate dark contour lines down each side. Total elimination gives you a flat, shapeless frame. Controlled dark reflections are what make glass read three-dimensional and premium. See Step 4.
How do you photograph glass with a phone?
A phone’s flat lens face is a real advantage, because there is no protruding barrel to reflect. Stand the object on black card or velvet, light a white card or wall behind it rather than the glass, and avoid the built-in flash. In a manual mode, drop ISO and lengthen the shutter instead of letting auto-ISO add grain. Dark field on a phone is achievable. A labelled bright-field composite is not.
How do you take pictures of things behind glass?
Turn the flash off, wipe the glass if permitted, and press the lens hood directly against it to remove the reflective air gap. That contact is the single most reliable fix, not the last resort most guides treat it as. If contact is not allowed, shoot at a slight angle, step back and let ambient lighting do more of the work, with a polariser as a secondary aid.
How do you photograph glass artwork?
Use soft, diffuse light rather than direct flash, then move the reflective plane off the light source by adjusting the camera angle or the piece itself. Flash creates hard reflections and, on some works, risks the pigment over time. For stained glass, shoot toward a window with white paper diffusing the light behind the piece so the colours read clean without glare.
Will a polarising filter fix my glass reflections?
Only partly. It works at Brewster’s angle, roughly 30 to 50 degrees, so it genuinely helps on glossy labels and on the surface a bottle stands on. It is largely ineffective against specular reflections in curved transparent glass, cannot cancel reflections arriving from several angles at once, and costs about 1.5 stops of light.
Why does my clear glass photograph green?
Ordinary clear float glass contains roughly 0.10% iron oxide, which absorbs red light and passes green. The tint builds with the distance light travels through the material, so it barely shows face-on but becomes obvious at the edges and through the long axis of a tall bottle. White balance correction helps. Changing your camera angle to shorten the path through the glass helps more.